


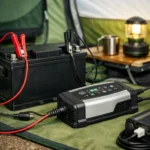


Quick Summary
The Smart 60 A LiFePO4 and Lithium-Ion Battery Charger, 0-15 V Adjustable has variable voltage and current settings for specified lithium battery types. Check the battery chemistry, charging voltage and permitted current before connecting it.
Key Details
| Detail | Product information and buyer relevance |
|---|---|
| Voltage adjustment | Adjustable from 0-15 V, with 14.6 V and 12.6 V charging configurations described. |
| Current adjustment | Stepless adjustment from 0-60 A. A maximum setting of approximately 55 A is recommended for battery lifespan. |
| Battery types stated | 14.6 V 4S LiFePO4 and 12.6 V 3S lithium batteries are specified. Match the setting to the exact battery. |
| Indicators and protection | LED indicators show charging status and diagnostic information. Built-in protection is labelled OTP/OVP/OCP/UVP. |
| Cooling and casing | Aluminium-alloy casing and a fan that starts automatically and shuts down after a delay. |
Key Features Explained
The voltage and current controls allow adjustment across the stated ranges. The LCD is described as showing 0 A when charging is complete. The fan’s automatic start and delayed shutdown are stated features; no specific temperature or operating limits are given.
What to Compare Before Buying
- Battery chemistry and voltage: Check the battery’s required charging voltage and whether it is the specified 4S LiFePO4 or 3S lithium type.
- Current limit: Compare the battery’s permitted charging current with the charger’s adjustable range, and follow the battery’s instructions.
- Connection and power requirements: Check that the connection arrangement and charger input requirements suit your setup.
Compatibility, Size and Fit
The description names 14.6 V 4S LiFePO4 and 12.6 V 3S lithium batteries. These details do not establish compatibility with every battery described as 12 V or lithium. Confirm the exact battery’s chemistry and charging specifications rather than relying on its general label.
Setup and Correct Use
- Connect the charger to the power supply.
- Set the required voltage with the red knob before connecting the battery.
- Attach the positive and negative crocodile clips to the battery.
- Increase the current gradually from a low setting. A maximum current setting of approximately 55 A is recommended.
Safe Use and Important Precautions
Set the voltage correctly before connecting the battery and do not adjust it during charging, as the product description warns this risks damage. Check the battery’s charging limits and follow its instructions. Do not assume the built-in protection labels replace correct settings or connection.
Before You Decide
Confirm the battery chemistry, required voltage and permitted current, then check the charger’s input and connection requirements. Also verify that the intended connection leads are included with the selected configuration.