
Kitchen Bins
Kitchen Bins for Practical Everyday Waste Storage
Kitchen bins provide a convenient place to contain food packaging, general household rubbish and recyclable materials before collection or disposal. Choosing the right capacity, lid style and compartment layout can make waste easier to manage while helping keep floors and worktops clearer.
Browse pedal bins, sensor bins, touch-top bins, slim designs, cupboard bins and multi-compartment recycling systems. Compare products by their external dimensions, litre capacity, opening mechanism, inner bucket, liner compatibility and cleaning requirements.
Explore Kitchen Bins at YPC to find practical options for compact kitchens, busy family homes, utility areas and households that want to separate rubbish and recycling more efficiently.
-
Kitchen Bins
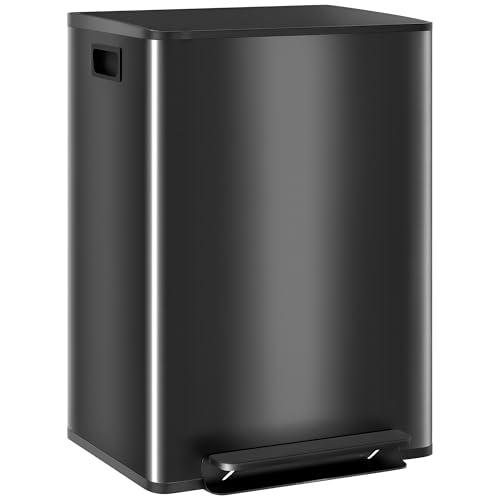
EKO Madison 50L Kitchen Pedal Bin with Soft Close and Stay-Open Lid
£83.99 *View On Amazon* -
Kitchen Bins
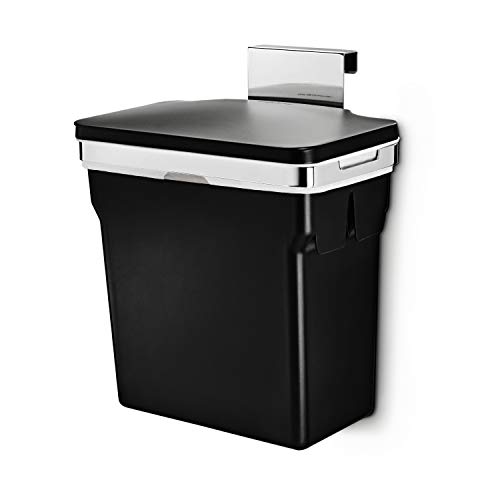
simplehuman CW1643 10L In-Cabinet Cupboard Kitchen Door Bin with Lid, Removable Bucket, Polished Steel Frame
Original price was: £29.95.£22.79Current price is: £22.79. *View On Amazon* -
Kitchen Bins
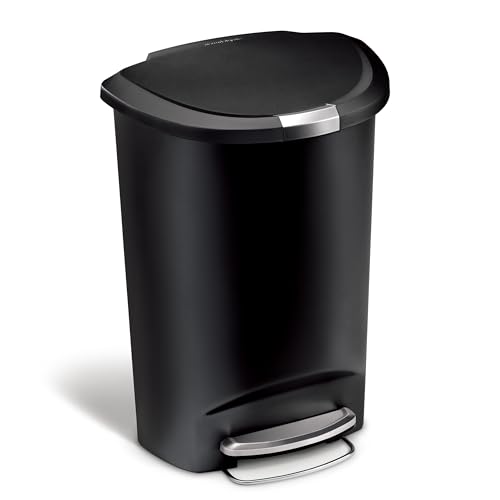
simplehuman CW1355 50L Semi-Round Kitchen Pedal Bin with Lid Lock and Silent Soft Close Lid
Original price was: £49.95.£46.40Current price is: £46.40. *View On Amazon* -
Kitchen Bins
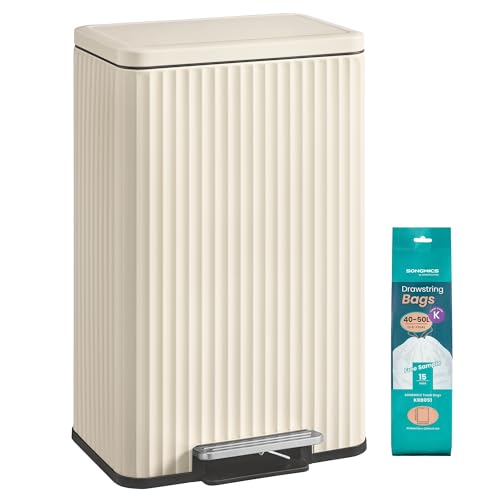
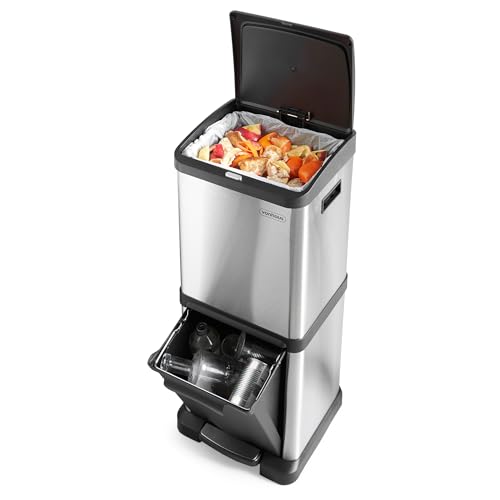
SONGMICS Dual Recycling Bin, Metal, 2 x 30 L, Cream, LTB060A01
Original price was: £89.99.£77.34Current price is: £77.34. *View On Amazon*










How to Choose a Kitchen Bin
Kitchen bins collect everyday rubbish, food packaging and other suitable household waste before it is transferred to an outdoor bin or collection point. The right design should fit the available space, hold a practical amount of waste and remain easy to open, empty and clean.
Start by measuring the intended position. Check the full width, depth and height, including the lid, pedal, handles and the additional space needed to remove an inner bucket or full liner.
Consider how much waste your household produces and how often the bin will be emptied. A larger bin may suit a family kitchen, while a compact or slim design can work better in a flat or smaller cooking area.
Types of Kitchen Bins
Pedal Kitchen Bins
Pedal bins open when you press a foot-operated mechanism near the base. This allows the lid to be lifted without touching it by hand, which can be convenient while preparing food or handling rubbish.
Check the pedal position and the amount of floor space needed in front of the bin. The bin should remain stable rather than sliding or tipping when the pedal is used.
Pedal mechanisms can vary in strength and smoothness. Inspect the hinge, connecting rod and pedal periodically and avoid forcing the lid open by hand where the instructions advise against it.
Sensor Kitchen Bins
Sensor bins use a motion detector to open the lid automatically when a hand or object moves within the detection area.
They can reduce direct contact with the lid and may be useful when both hands are occupied. However, they require batteries, charging or mains power, depending on the model.
Check the sensor range and where the bin will be positioned. A sensor bin placed beside a busy walkway, cupboard door or pet feeding area may open more often than intended.
Keep electronic lids and battery compartments dry and follow the product instructions when cleaning them.
Touch-Top Kitchen Bins
Touch-top bins use a push mechanism that releases or closes the lid when pressed.
They provide a neat appearance and can be easy to operate. The catch should close securely without requiring excessive force.
Check whether the mechanism can be removed or replaced if it becomes worn. Food residue and grease can collect around the catch, so the area may need regular cleaning.
Swing-Top Kitchen Bins
Swing-top bins have a balanced lid that moves when rubbish is pushed through the opening.
They offer quick access without a pedal or electrical mechanism. However, the lid can touch the waste and may require more frequent cleaning.
Check the opening size, particularly if you regularly dispose of larger packaging. Items that are too wide can become trapped or hold the lid open.
Lift-Lid Kitchen Bins
Lift-lid bins have a simple removable or hinged cover that is raised by hand.
Their straightforward design can be easy to clean and contains fewer mechanical parts than pedal or sensor alternatives.
They do require direct handling, so the lid and handle should be cleaned regularly. Check that there is enough space above the bin to open the lid fully.
Open-Top Kitchen Bins
Open-top bins provide immediate access without a lid.
They can suit dry recycling, clean packaging or locations where waste is emptied frequently. They are generally less suitable for food waste and rubbish that may create odours or attract pets.
Use an open bin only where the waste type and household conditions make it appropriate.
Slim Kitchen Bins
Slim kitchen bins are designed for narrow gaps beside cupboards, appliances or walls.
They can make use of limited floor space, but their taller shape can make full liners heavier and more difficult to remove.
Measure the gap at its narrowest point and account for skirting boards, handles, pedals and lid movement. Avoid positioning the bin where it restricts access to an appliance or cupboard.
Corner Kitchen Bins
Corner bins are shaped or sized to fit into unused kitchen corners.
They can provide useful capacity without projecting as far into the room as a wide rectangular bin. Check that the lid and pedal remain accessible once the bin is positioned.
Allow enough space to clean behind and around the bin.
Built-In Cupboard Bins
Built-in bins fit inside a kitchen cupboard, helping keep rubbish hidden and freeing visible floor space.
They may be fixed to the cupboard base, attached to the door or mounted on pull-out runners. Some include several compartments for general waste and recycling.
Measure the cupboard’s internal width, depth and height, including hinges, shelves, pipes and door fittings.
The installation should not obstruct plumbing, cupboard ventilation or access to other stored items.
Pull-Out Kitchen Bins
Pull-out bins slide forwards on runners when the cupboard or storage unit is opened.
They can make separate waste compartments easy to reach and keep the bin contained inside fitted kitchen furniture.
Check the runner capacity, extension distance and mounting requirements. Do not overload the compartments or lean on the bin while it is extended.
Keep the runners clean and stop using the system if it becomes loose, uneven or difficult to close.
Under-Sink Kitchen Bins
Under-sink bins use cupboard space beneath a kitchen sink.
This area can be convenient, but pipes, waste traps and cleaning products reduce the usable room. Measure around every fitting rather than relying only on the overall cupboard dimensions.
Leave stop taps and plumbing connections accessible. Check the cupboard regularly for leaks that could affect the bin, liners or surrounding storage.
Countertop Food-Waste Bins
Small countertop bins or food caddies collect peelings, leftovers and other food waste accepted by the relevant local scheme.
They can be positioned close to the food-preparation area while cooking. Choose a stable design with a lid that is easy to remove or open.
Empty food-waste containers regularly and clean them thoroughly to reduce residue and smells.
Keep the caddy away from direct heat, hob flames and uncovered food.
Multi-Compartment Kitchen Bins
Multi-compartment bins divide waste into separate sections within one unit.
They can help organise general rubbish, recycling and food waste, depending on the individual design and local collection arrangements.
Check the capacity of each compartment rather than only the total litre figure. One section may fill much faster than another, particularly when food packaging forms a large part of the household waste.
Stackable Recycling Bins
Stackable bins allow compatible containers to be arranged vertically.
They can suit utility areas, cupboards and kitchens where floor space is limited. Front-opening lids may allow access without removing the container above.
Only stack products designed for this purpose. Place heavier materials lower down and follow any stated stacking and load limits.
Important Buying Considerations
Bin Capacity
Kitchen-bin capacity is normally shown in litres.
Smaller bins require more frequent emptying but can help prevent food waste remaining indoors for too long. Larger bins hold more rubbish but occupy additional space and may become heavy or unpleasant if left full.
Consider:
- Household size
- Frequency of collection
- Amount of food waste
- Volume of packaging
- Whether recycling is separated
- Available storage space
- Liner sizes
- How far the bin must be carried
A large stated capacity is not automatically more practical for every kitchen.
External Dimensions
Measure the bin itself rather than choosing by litre capacity alone.
Allow space for:
- The lid to open
- A foot pedal
- Handles
- Hinges
- An inner bucket
- Liner overhang
- Cupboard doors
- Appliance doors
- Skirting boards
- Removing the bin for cleaning
A tall bin may fit beneath a worktop while closed but become impossible to open fully.
Lid Opening Height
Pedal, sensor and lift-up lids need clear vertical space.
Measure from the floor to any worktop, shelf or cupboard above the proposed position. Check the bin’s height with the lid fully open where this information is listed.
Do not position a lid where it repeatedly strikes furniture or walls.
Shape
Round bins can provide a smooth appearance and may be easier to position in open spaces.
Rectangular and square bins often make more efficient use of corners, cupboard interiors and narrow gaps.
Slim bins reduce width but can become tall or deep. Choose the shape that fits the actual kitchen layout rather than appearance alone.
Liner Compatibility
Check which liner sizes and styles are recommended.
Some bins accept standard refuse sacks, while others use fitted bags, coded liners or proprietary cartridges. Specialist liners may provide a neater fit but can create ongoing replacement requirements.
A liner that is too small may tear or fall inside the bin. An oversized bag can bunch around the lid and interfere with pedals, sensors or catches.
Inner Buckets
A removable inner bucket can make liner fitting, emptying and cleaning easier.
Check whether it has a carrying handle and whether it can be removed without dismantling the lid. The inner capacity may be noticeably smaller than the bin’s external volume.
Some multi-compartment bins include several removable buckets that can be carried separately.
Opening Mechanism
Choose an opening method suited to how the bin will be used.
Pedal bins provide mechanical hands-free opening. Sensor bins operate automatically but require power. Touch lids offer a neat finish, while lift lids provide simplicity.
Consider cleaning, maintenance and the risk of accidental opening as well as convenience.
Materials
Kitchen bins may be made from plastic, stainless steel, coated metal or mixed materials.
Plastic is lightweight and generally easy to wipe. Metal provides a rigid structure and may offer a polished appearance, but fingerprints and water marks can be more visible.
Check for smooth internal surfaces, corrosion-resistant finishes and care instructions suited to the material.
Fingerprint-Resistant Finishes
Some metal bins are described as fingerprint resistant or easy to clean.
The effectiveness can vary by finish and household use. Grease, water marks and repeated handling may still be visible.
Use only cleaning methods recommended for the coating. Abrasive products can scratch or dull the surface.
Stability
A kitchen bin should remain steady when the pedal is pressed, the lid opens or waste is added.
Tall, narrow bins may be more likely to tip if they are overloaded or positioned on uneven flooring.
Place the bin on a level surface and keep heavier waste near the bottom. Do not lean on the lid or use the bin as a support.
Ease of Cleaning
Food residue, leaking liners and packaging spills can collect inside a kitchen bin.
Smooth interiors, removable lids and inner buckets can make cleaning easier. Narrow hinges, sensors and complex catches may require additional care.
Choose a design that can be emptied and cleaned without requiring specialist tools.
Pedal Bin or Sensor Bin
A pedal bin provides hands-free access without batteries, charging or electronic parts. It can be dependable and straightforward, although the pedal and hinge may wear over time.
A sensor bin opens automatically and can be convenient when carrying waste with both hands. It usually costs more and requires battery or charging maintenance.
Sensor performance can be affected by positioning, movement and contamination around the detector.
The right choice depends on budget, room layout and preferred level of maintenance.
Touch Bin or Pedal Bin
A touch-top bin offers a clean, compact appearance and does not require floor space for a pedal.
A pedal bin can be opened without using your hands, which may be more convenient during food preparation.
Touch mechanisms need direct contact and can collect marks, while pedal systems contain additional moving components near the base.
Freestanding or Built-In Kitchen Bin
A freestanding bin can be moved, cleaned and replaced easily. It occupies visible floor space and needs to fit around kitchen furniture.
A built-in bin hides waste inside a cupboard and can support a more streamlined kitchen layout. It requires accurate installation and uses cupboard space that could otherwise hold household items.
Choose according to the kitchen design, available storage and whether permanent installation is appropriate.
Single or Multi-Compartment Kitchen Bin
A single bin provides one large space and may be easier to line and empty.
A multi-compartment bin separates rubbish and recycling at the point of disposal. Each section is smaller and may need emptying at a different frequency.
Choose a compartment layout that matches how your local council collects waste rather than assuming every recycling system is the same.
Large or Small Kitchen Bin
A large bin can suit a busy household and reduce the number of trips to an outdoor container.
A smaller bin takes up less space and encourages more frequent emptying, which may be useful for food-related waste.
The most appropriate size balances capacity, hygiene, available space and how easily a full liner can be lifted.
Kitchen Bins for Small Kitchens
Compact kitchens can benefit from slim, under-sink or cupboard-mounted bins.
Measure carefully and keep doorways, appliance access and work areas clear. A bin placed in a narrow walkway can become a repeated trip hazard.
Consider separating recycling into stackable boxes or reusable bags in a utility area if a large multi-compartment bin will not fit.
Kitchen Bins for Family Homes
Family kitchens may produce larger amounts of packaging, food waste and general rubbish.
A high-capacity bin or multi-compartment system can reduce clutter, provided each section remains easy to empty and clean.
Choose robust opening mechanisms and position the bin so children cannot access unsafe waste.
Kitchen Bins for Flats
Flats may have limited floor space and shared external waste areas.
A compact bin that can be carried easily may be more practical than an oversized model. Stackable recycling containers can help organise materials before they are taken to a communal collection point.
Do not store bins or rubbish bags in shared corridors, stairways or fire exits.
Kitchen Bins for Utility Rooms
A utility room can provide space for larger general-waste and recycling containers.
Keep bins away from clean laundry, appliance ventilation and household chemicals. Make sure lids and drawers can open without obstructing washing machines or tumble dryers.
Food waste should still be emptied regularly, even when the bin is located away from the main kitchen.
Kitchen Bins for Recycling
A recycling bin should reflect current local collection requirements.
Common household categories may include:
- Paper
- Cardboard
- Plastic packaging
- Metal tins
- Drinks cans
- Glass
- Food waste
- General rubbish
Accepted materials and sorting arrangements can differ between councils. Check local guidance rather than relying only on bin labels or packaging symbols.
Multi-Compartment Recycling Systems
A multi-section bin can make sorting faster because materials are separated before they leave the kitchen.
Look at the size of each compartment. Packaging and mixed recycling may need more capacity than food waste.
Clear labels or removable symbols can help household members use the correct section.
Kitchen Food-Waste Caddies
Food caddies are intended for food scraps accepted by the relevant local collection or composting scheme.
Empty the caddy before it becomes overfilled or develops strong smells. Check whether the local service accepts compostable liners, newspaper or unlined containers.
A bag described as biodegradable is not automatically accepted by every council.
Cleaning Recyclable Packaging
Remove leftover food and liquids where local guidance requires it.
A brief rinse may help reduce smells and contamination. Allow packaging to drain before placing it inside paper bags or enclosed recycling bins.
Do not waste excessive hot water simply to prepare lightly marked packaging unless specific cleaning is required.
Flattening Packaging
Flatten suitable cardboard boxes and packaging to reduce the space they occupy.
Check whether bottle caps, lids and labels should remain attached under local guidance.
Take care around sharp metal edges, staples and rigid plastic packaging.
Positioning a Kitchen Bin
Place the bin somewhere convenient but away from direct heat and food preparation surfaces.
Avoid positioning it:
- Directly beside a hob
- Against a radiator
- In front of an appliance door
- Across a walkway
- Beneath a leaking pipe
- Where the lid strikes a worktop
- Near uncovered food
- Where pets can easily overturn it
- Beside electrical equipment
- Where children can reach unsafe waste
Leave enough room to clean the floor and surrounding surfaces.
Using a Kitchen Bin Safely
Do not place hot ash, burning materials, hot oil or hot cookware inside a kitchen bin.
Allow hot waste to cool safely before disposal. Cooking oils and fats should be handled according to local waste guidance rather than poured into drains.
Avoid compressing bin contents with bare hands because sharp packaging may be hidden beneath the surface.
Choosing Bin Liners
Choose liners that match the bin dimensions, waste type and expected weight.
Standard liners may suit general rubbish, while stronger bags can be useful for heavier or sharper packaging. Food-waste caddies may require particular approved liners.
Check the liner’s width, length, capacity and closure style.
Fitting a Bin Liner
Open the liner fully and position it against the base and sides.
Remove trapped air so the bag does not pull out of place when waste is added. Secure the top using the bin’s retaining ring, clips or liner holder where provided.
Keep the liner clear of hinges, sensors and pedal mechanisms.
Removing a Full Bin Liner
Do not overfill the bag until it cannot be tied or lifted safely.
Check the weight before removing it and avoid pulling the liner past sharp edges. Tie or close the bag and carry it without allowing it to drag across flooring.
Split heavy waste into smaller bags where necessary.
Preventing Leaks
Place wet or liquid waste into appropriate sealed packaging where permitted rather than pouring it directly into the bin.
Check food containers and packaging before disposal. Replace liners that are torn, punctured or too small.
Clean leaks immediately so residue does not collect beneath the inner bucket or damage flooring.
Preventing Kitchen Bin Odours
Regular emptying and cleaning are more important than fragrance alone.
To reduce smells:
- Empty food waste frequently
- Use a suitable lid
- Clean spills promptly
- Rinse accepted packaging
- Replace damaged liners
- Wash the inner bucket
- Allow the bin to dry
- Keep the kitchen ventilated
- Avoid trapping liquids
- Keep the bin away from heat
Deodorising products may help mask or absorb smells, but they do not remove the source.
Cleaning a Kitchen Bin
Empty the bin completely and remove the liner and inner bucket.
Use a cleaning method suitable for the material. Pay attention to the lid, rim, pedal, handles and grooves where residue can collect.
Rinse where appropriate and dry every part before inserting a fresh liner.
Wear gloves where required and wash your hands after handling household waste.
Cleaning a Plastic Kitchen Bin
Plastic bins can often be washed or wiped using a suitable mild cleaner.
Avoid very hot water or harsh solvents unless the manufacturer confirms that they are safe for the material.
Dry the bin thoroughly, particularly around hollow rims, hinges and the base.
Cleaning a Stainless-Steel Kitchen Bin
Use a soft cloth and a cleaner suitable for the finish.
Avoid abrasive scourers and harsh chemicals that could scratch, stain or dull the surface. Wipe in the direction of the grain where appropriate.
Dry the metal after cleaning to reduce water marks.
Cleaning a Sensor Bin
Switch off the bin or remove the batteries where the instructions require it.
Do not immerse the lid, motor, sensor or battery compartment in water. Wipe electronic sections using the approved method.
Keep moisture away from charging ports and electrical connections.
Cleaning a Pedal Bin
Clean around the pedal, hinge and connecting mechanism where food residue and dust may collect.
Avoid forcing water into enclosed moving parts. Check that the pedal operates smoothly once the bin is dry.
Do not apply lubricants unless the manufacturer recommends a specific product and method.
Cleaning an Inner Bucket
Remove the inner bucket and empty loose residue.
Wash or wipe it according to the material guidance. Clean beneath the rim and around handles where liquid can collect.
Allow the bucket to dry fully before fitting a new liner.
Preventing Pests
Keep food waste contained and empty the bin regularly.
Clean the lid, floor and surrounding wall after spills. Avoid leaving full rubbish bags beside the bin overnight.
If insects or rodents appear repeatedly, identify and address the access point and food source rather than relying only on fragrance products.
Kitchen Bins Around Children
Young children may open bins, remove rubbish or touch unsafe waste.
Keep items such as the following securely contained:
- Broken glass
- Sharp tins
- Cleaning products
- Batteries
- Medicines
- Food-waste liners
- Raw food packaging
- Small detachable parts
- Used blades
- Electrical waste
A cupboard-mounted bin or child-resistant fitting may be useful where compatible, but supervision and safe waste handling remain essential.
Kitchen Bins Around Pets
Pets may knock over bins, tear liners or eat food waste that could cause harm.
Choose a secure lid or position the bin inside a suitable cupboard where necessary. Keep bones, medicines, chocolate, cleaning products and other unsafe waste completely inaccessible.
Check that sensor bins are not repeatedly activated by animals passing nearby.
Preventing Floor Damage
Grit and residue trapped beneath a bin can scratch wood, laminate and other flooring.
Move the bin periodically and clean the base and floor. Use suitable protective feet or mats where compatible.
Do not drag a full bin across delicate flooring.
Preventing Wall and Cupboard Marks
Lids, pedals and bin sides can strike nearby surfaces during daily use.
Allow a small gap between the bin and painted walls or cupboard doors. Protective pads may help where suitable and where they do not interfere with the mechanism.
Clean splashes promptly to reduce staining.
Maintaining Pedals, Hinges and Lids
Inspect moving parts regularly for:
- Loose hinges
- Cracked pedals
- Broken connecting rods
- Failed catches
- Damaged seals
- Bent lids
- Sharp edges
- Unusual movement
- Difficulty closing
- Excessive noise
Repair only where the manufacturer provides suitable parts and instructions.
Maintaining Sensor Components
Keep the sensor clean and free from grease, dust and residue.
Replace batteries using the correct type and polarity. Remove batteries before prolonged storage where advised.
Stop using the automatic mechanism if the lid moves unpredictably, traps objects or fails to remain safely open or closed.
Preventing Rust and Corrosion
Metal bins can develop corrosion if coatings become damaged or moisture remains trapped.
Wipe spills promptly and dry the bin after cleaning.
Inspect the base, pedal and lid edges regularly. Replace a bin that develops sharp rusted areas or structural weakness.
Kitchen Bin Placement and Fire Safety
Keep bins away from hobs, ovens, portable heaters and open flames.
Do not store aerosols, batteries or flammable household products in general kitchen rubbish where specialist disposal is required.
The bin should not block doors, exits or access to fire-safety equipment.
Carrying Waste Outside
Use the bin handles or tied liner where appropriate and check the weight before lifting.
Keep the load close to your body and avoid allowing it to block your view on stairs or paths.
Clean any leaks or dropped waste promptly and wash your hands afterwards.
Labelling Kitchen Recycling Bins
Clear labels can help everyone in the household sort waste correctly.
Labels may identify:
- General waste
- Mixed recycling
- Paper and card
- Glass
- Tins and cans
- Plastic packaging
- Food waste
Match the labels to current local collection arrangements.
Colour-Coded Compartments
Colours can make recycling sections easier to recognise.
Do not assume a particular colour means the same thing in every council area. Written or picture labels can provide additional clarity.
Choose removable labels where local recycling rules or household needs may change.
Preventing Recycling Contamination
Incorrect items can make household recycling harder to process.
Check local guidance before adding:
- Greasy food packaging
- Plastic film
- Drinking glasses
- Ceramics
- Batteries
- Electrical items
- Compostable plastics
- Aerosols
- Paint containers
- Medical waste
Where uncertain, use the appropriate local disposal service rather than guessing.
Kitchen Bins in Rented Homes
Freestanding bins avoid permanent changes to cupboards and fitted furniture.
Built-in and door-mounted systems may require permission where drilling or modification is involved.
Check the tenancy agreement before installing permanent runners, brackets or cupboard mechanisms.
When to Replace a Kitchen Bin
Replace a kitchen bin when it becomes:
- Cracked
- Unstable
- Permanently odorous
- Difficult to clean
- Rusted
- Sharp
- Unable to close
- Damaged around handles
- Faulty around pedals
- Unreliable around sensors
- Unable to contain liners securely
A damaged bin can leak, attract pests or become unsafe to handle.
Useful Kitchen Bin Accessories
Useful additions may include:
- Fitted bin liners
- Food-caddy liners
- Replacement filters
- Recycling labels
- Inner buckets
- Liner-retaining rings
- Replacement catches
- Deodorising products
- Bin-cleaning brushes
- Protective floor mats
Check dimensions and compatibility before ordering replacement parts or liners.
Use fragrance and cleaning products according to their instructions and keep them away from children and pets.
Why Buy Kitchen Bins from YPC?
At YPC, we understand active lifestyles and the need for practical products that work in real use. Our Kitchen Bins category makes it easier to compare pedal, sensor, touch-top, slim and recycling designs for different household spaces.
Browse the available options and compare dimensions, capacity, opening mechanism, materials and compartment layout to find a kitchen bin suited to your waste, recycling routine and available space.
Frequently Asked Questions
What size kitchen bin should I choose?
Consider your household size, available floor or cupboard space and how often rubbish is emptied. Compare the full external dimensions as well as the litre capacity.
Is a pedal bin or sensor bin better?
Pedal bins require no batteries and provide hands-free opening. Sensor bins open automatically but need power and additional maintenance. The right option depends on your preferences and kitchen layout.
Are multi-compartment kitchen bins useful?
They can make it easier to separate general waste, recycling and food scraps. Check the capacity of each compartment and match the layout to local collection rules.
Can a kitchen bin be stored under the sink?
Yes, where the bin fits around the plumbing and leaves pipes and stop taps accessible. Measure the cupboard carefully and check regularly for leaks.
How often should a kitchen bin be cleaned?
Clean it whenever a liner leaks or residue develops and include it in your regular kitchen-cleaning routine. Food-waste caddies usually require more frequent cleaning.
 Getting ready for Summer? View our Home and Garden Products

Heading outdoors this winter? Take a look at our Outdoor Clothing.