
Dish Racks and Drainers
Dish Racks and Drainers for Organised Kitchen Drying
Dish racks and drainers provide a stable place for washed plates, bowls, cups, cutlery and suitable cookware to drain and dry beside or above the sink. Choosing the right size and layout can help organise everyday washing up while reducing standing water and clutter around the worktop.
Browse compact dish drainers, two-tier racks, over-sink designs, folding drainers, cutlery holders and models with removable drip trays or drainage spouts. Compare products by their dimensions, capacity, materials, plate spacing, drainage direction and suitability for your sink and available worktop space.
Explore Dish Racks and Drainers at YPC to find practical options for small kitchens, family homes, utility rooms and regular household washing up.
- Dish Racks and Drainers
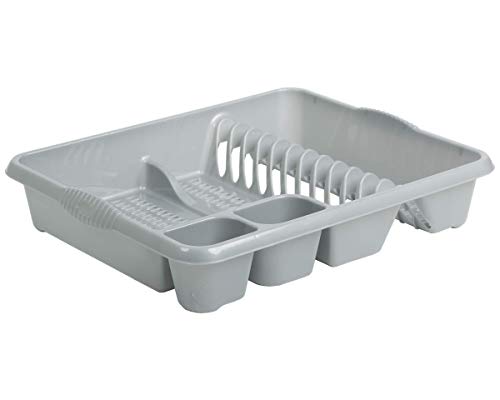
Anika Kitchen Dish Drainer and Drying Rack with Removable Drip Tray and Cutlery Holder, Grey, 69069
Original price was: £11.99.£11.49Current price is: £11.49. *View On Amazon* - Dish Racks and Drainers
LLHONG Expandable Dish Drying Rack with Utensil Cutlery Holder
£11.99 *View On Amazon* - Dish Racks and Drainers
Besto Dish Drainer Rack for Kitchen Sink, Large
Original price was: £17.99.£15.29Current price is: £15.29. *View On Amazon* - Dish Racks and Drainers
DIVCHI Dish Drainer & Drying Rack with Removable Drip Tray and Cutlery Holder, Grey
£12.29 *View On Amazon* - Dish Racks and Drainers
simplywire Circular Dish Drainer Round Sink Drying Rack Black
Original price was: £18.99.£17.49Current price is: £17.49. *View On Amazon* - Dish Racks and Drainers
M.J COMFY-LIFE Dish Drainer Rack with Removable Drip Tray, White
Original price was: £14.99.£12.74Current price is: £12.74. *View On Amazon* - Dish Racks and Drainers
Wham Extra Large Plastic Dish Drainer, Plate and Cutlery Rack, Silver
Original price was: £6.61.£6.29Current price is: £6.29. *View On Amazon* - Dish Racks and Drainers
Amazon Basics Dish Drying Rack, Stainless Steel, Black
£14.74 *View On Amazon* - Dish Racks and Drainers
M1SS 39cm Rectangular Washing Up Bowl with Dish Drainer, Midnight Black
Original price was: £10.09.£9.59Current price is: £9.59. *View On Amazon* - Dish Racks and Drainers
Voency Expandable Over Sink Dish Drying Rack with Utensil Holder
£15.99 *View On Amazon* - Dish Racks and Drainers
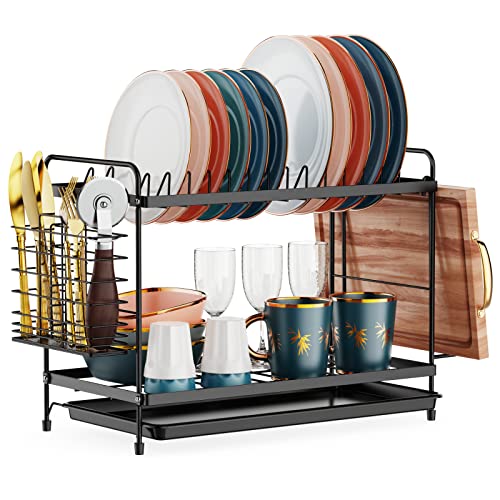
iSPECLE 2 Tier Dish Drainer Compact Rack for Small Kitchens, Black
£14.99 *View On Amazon* - Dish Racks and Drainers
Nfnoyp 2 Tier Dish Drainer Rack with Drainboard, Black
Original price was: £36.99.£31.44Current price is: £31.44. *View On Amazon* - Dish Racks and Drainers
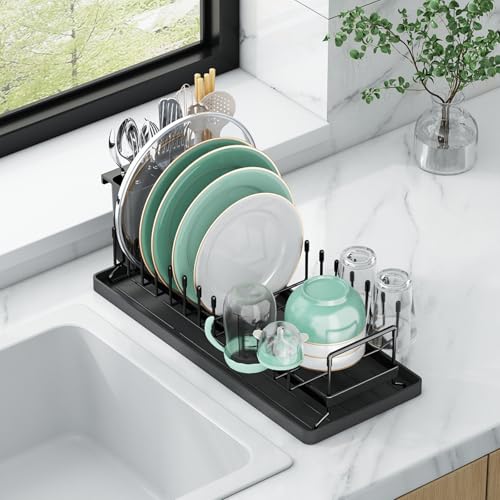
Nfnoyp Small Dish Drainer Rack with Adjustable Slots, 16.5 x 6.5 x 7 inch, Black
£19.99 *View On Amazon* - Dish Racks and Drainers
Aufworld Compact Dish Drying Rack with Silicone Drying Mat and Utensil Holder
£15.99 *View On Amazon* - Dish Racks and Drainers
2 Tier Dish Drainer Rack with Drip Tray and Absorbent Mat for Kitchen
£25.99 *View On Amazon* - Dish Racks and Drainers
APPASO Gold Dish Drainer Rack with Cutlery Holder
Original price was: £29.99.£25.49Current price is: £25.49. *View On Amazon* - Dish Racks and Drainers
iSPECLE Small In-Sink Dish Drainer Rack, Silver/Black
£19.99 *View On Amazon* - Dish Racks and Drainers
ViviDreamore Dish Drainer Rack with Sponge and Cutlery Holder, Black, Large
Original price was: £14.99.£12.99Current price is: £12.99. *View On Amazon* - Dish Racks and Drainers
Nfnoyp Dish Drainer Rack with Drip Tray and Utensil Holder, Blue
Original price was: £23.99.£19.99Current price is: £19.99. *View On Amazon* - Dish Racks and Drainers
romision 2 Tier Stainless Steel Dish Drainer Rack with Drip Tray
Original price was: £29.99.£19.99Current price is: £19.99. *View On Amazon* - Dish Racks and Drainers
JOUING Dish Drainer Rack with Drip Tray, 360° Swivel Spout, White Large
£19.20 *View On Amazon* - Dish Racks and Drainers
MEHRU Stainless Steel Dish Drainer Rack, 18 Slots, Silver, L48.5 x W30 x H10cm
Original price was: £14.99.£13.99Current price is: £13.99. *View On Amazon* - Dish Racks and Drainers
FurnitureXtra Stainless Steel Dish Drainer with Plastic Drip Tray and Cutlery Holder
£16.95 *View On Amazon*








How to Choose a Dish Rack or Drainer
Dish racks and drainers hold washed crockery, cutlery, glasses and suitable cookware while excess water drains away. They can help keep items upright, improve airflow and create a dedicated drying area beside or above the kitchen sink.
The right design depends on the amount of washing up your household produces, the available worktop or sink space and the size and shape of the dishes you use regularly.
Measure the intended position before ordering. Compare the complete width, depth and height, including cutlery holders, cup racks, feet, drainage spouts and any upper tiers.
Types of Dish Racks and Drainers
Standard Dish Drainers
Standard dish drainers provide a single level for plates, bowls, cups and cutlery.
They can suit everyday washing up and are often easy to lift and clean. Designs may include fixed plate slots, an open section for bowls and pans and a removable cutlery holder.
Check that the rack fits fully on the draining board or worktop without projecting into walkways or over unsupported edges.
Compact Dish Racks
Compact racks are designed for smaller kitchens, flats and households that wash fewer items at a time.
They use less worktop space and can be easier to store. Their reduced capacity means they may need to be emptied more frequently.
Compare the plate-slot width and open drying area with the crockery you use most often.
Large Dish Drainers
Large drainers provide more room for family washing, pans, serving dishes and multiple place settings.
They can reduce the need to balance items on tea towels or worktops. However, they require a wide, stable surface and can become heavy when fully loaded.
Check wall-cupboard clearance and make sure the rack does not obstruct the tap or food-preparation space.
Two-Tier Dish Racks
Two-tier racks use vertical space to increase drying capacity.
The lower tier often holds plates, bowls and cookware, while the upper level may suit cups, glasses or smaller dishes. Some designs reverse this arrangement.
Place heavier items on the lower level and follow any stated weight limits. Make sure water from the upper tier drains into an appropriate tray or sink rather than onto dry items below.
Three-Tier Dish Racks
Three-tier racks provide additional vertical storage for households with limited worktop width.
They can hold a larger number of dishes, but their height and centre of gravity require careful consideration. Check that the rack remains stable when items are removed from one side.
Tall racks may not fit beneath wall cupboards or shelving.
Folding Dish Racks
Folding racks collapse or flatten when not in use.
They can suit kitchens where the drying area needs to be cleared after washing up. Folding sections may be made from coated metal, plastic, silicone or wood.
Check that the rack locks securely into its open position and inspect hinges regularly for looseness, rust or trapped residue.
Collapsible Dish Drainers
Collapsible drainers use flexible sections that compress for storage.
They may combine a rigid rim with silicone or flexible plastic walls. Some include plate dividers, cutlery compartments and drainage outlets.
Clean and dry every fold before collapsing the product for storage.
Over-Sink Dish Racks
Over-sink racks sit across or above the sink so water drains directly into the basin.
They can free worktop space and suit kitchens without a built-in draining board. Options range from simple roll-up racks to large freestanding structures that span the full sink area.
Measure the sink width, tap height and surrounding worktop carefully. The rack must be supported securely and should not obstruct normal access to the sink.
Roll-Up Dish Drainers
Roll-up drainers use metal or rigid bars connected by flexible silicone or another material.
They can sit across a compatible sink for drying dishes, glasses and suitable kitchen utensils. After use, they roll into a compact shape.
Check the supported span and maximum load. Do not use the rack as a chopping board, heat mat or support for heavy cookware unless the product specifically permits it.
Sink-Mounted Dish Drainers
Sink-mounted drainers rest on the sink rim or inside part of the bowl.
They may include adjustable arms or extendable sections to fit different sink widths. The support points should sit securely without scratching the sink.
Make sure the drainer does not cover the waste outlet completely or prevent the tap from being used.
Dish Racks with Drip Trays
A drip tray collects water beneath the rack.
This can protect worktops that do not include a built-in draining board. Removable trays are generally easier to empty and clean than fixed bases.
Check that the tray extends beneath all drying sections and remains level when loaded.
Dish Racks with Drainage Spouts
Drainage-spout racks direct collected water back into the sink.
The spout may be fixed, rotating or extendable. Check its direction and length before ordering so the rack can be positioned where the water reaches the sink.
Clean the spout and drainage channel regularly to prevent residue restricting the flow.
Self-Draining Dish Racks
Self-draining racks use sloped bases, channels or spouts to move water away from crockery.
They can reduce standing water when positioned correctly. The worktop must remain level enough for the system to drain in the intended direction.
Check that the outlet is lower than the rest of the tray and is not blocked by the sink rim.
Metal Dish Racks
Metal racks provide a rigid frame and can use relatively narrow rails, leaving more open space around dishes.
They may be made from stainless steel, chrome-plated metal or coated wire. The finish and resistance to rust can vary.
Inspect joints, feet and coatings regularly. Replace the rack if exposed metal becomes sharp or heavily corroded.
Plastic Dish Drainers
Plastic drainers are lightweight and generally straightforward to wash.
They may include moulded plate slots, cutlery sections and drainage channels. Smooth plastic can be easy to wipe, although scratches and textured areas may collect residue.
Avoid placing very hot cookware onto the rack unless the product is listed as suitable.
Silicone Dish Drainers
Silicone drainers may be flexible, non-slip and easy to roll or fold.
They can suit compact storage and may reduce noise when dishes are placed down. Deep grooves and flexible joints need regular cleaning.
Check heat limits and dishwasher suitability where these features matter.
Wooden Dish Racks
Wooden and bamboo racks can provide a warm, decorative appearance.
They need careful drying and should not remain in standing water. Repeated moisture exposure can lead to staining, swelling, splitting or mould.
Follow any oiling, cleaning and storage guidance supplied with the product.
Wall-Mounted Dish Racks
Wall-mounted racks keep the worktop clear and can provide fixed drying or storage space.
They require suitable fixings and a wall capable of supporting the rack and wet dishes. Installation should account for pipes, electrical cables and splash zones.
Do not overload the rack or mount it where falling dishes could cause injury.
Cupboard-Mounted Dish Racks
Some racks fit inside or above a sink cupboard and allow water to drain into a tray below.
They can keep dishes organised and free external worktop space. Measure the cupboard interior, shelf height and door clearance carefully.
Ventilation is important because enclosed damp storage can encourage odours and mould.
Dish Racks with Cutlery Holders
Cutlery holders keep knives, forks, spoons and utensils upright.
Separate compartments can help organise smaller items and prevent them collecting in one area. Drainage holes should allow water to escape.
Place sharp knives where blades cannot injure someone reaching into the holder.
Dish Racks with Cup Holders
Cup racks use pegs, hooks or side rails to hold mugs, glasses and bottles.
Check the peg spacing and supported weight. Heavy mugs can make a lightweight rack unstable when all are placed on one side.
Delicate glasses should not touch neighbouring plates or cookware.
Dish Racks with Glass Holders
Glass holders may suspend stemware or position glasses at an angle for drainage.
Check whether the holder suits the stem and bowl size of your glassware. Valuable or delicate glasses may require a dedicated drying mat or specialist rack.
Do not overcrowd the holder or allow glass items to strike one another.
Dish Racks with Bottle Holders
Bottle pegs can hold reusable bottles, baby bottles and narrow containers upside down.
Check the peg height and diameter against the bottle opening. Remove lids, seals and straws where permitted so each component can dry separately.
Large or heavy bottles can affect rack balance.
Dish Racks with Pan Sections
Some drainers include open spaces or adjustable dividers for pans, chopping boards and larger dishes.
Check the supported size and weight. Heavy cookware should remain on the lower level and close to the centre of the rack.
Do not force thick pans into narrow plate slots.
Adjustable Dish Racks
Adjustable racks may extend in width, move dividers or reconfigure storage sections.
They can adapt to different loads and sink spaces. Check the locking or sliding mechanism and make sure it remains secure when fully extended.
Clean adjustable joints because grease and limescale can restrict movement.
Modular Dish Racks
Modular drainers use removable sections such as cup rails, cutlery holders and plate dividers.
They allow the layout to be changed for different washing loads. Compatibility between sections is usually specific to the rack system.
Store removed components somewhere clean and dry.
Important Buying Considerations
Available Worktop Space
Measure the full area beside the sink.
Allow room for:
- The rack body
- Cutlery holders
- Cup rails
- Drainage spouts
- Drip trays
- Nearby appliances
- Cupboard doors
- Tap controls
- Food-preparation space
- Safe lifting of dishes
A rack that technically fits may still make the kitchen awkward to use.
Sink Dimensions
Over-sink and sink-mounted racks require accurate measurements.
Check the:
- Internal sink width
- External sink opening
- Rim width
- Divider thickness
- Tap position
- Tap height
- Waste position
- Sink depth
- Distance to surrounding walls
- Available support surface
Do not assume an adjustable rack will fit every sink.
Wall-Cupboard Clearance
Tall racks need enough vertical space beneath wall cupboards and shelves.
Measure from the worktop to the lowest obstruction. Include the height of plates, glasses and bottles placed on the upper tier.
Leave enough clearance to remove items without striking the cupboard.
Capacity
Capacity may be described by the number of plates, place settings or items the rack can hold.
These figures are approximate because crockery sizes vary. Large dinner plates, deep bowls and cookware take up more room than small side plates.
Choose according to your actual washing load rather than a general item count alone.
Plate-Slot Width
Plate slots should be wide enough for your crockery while still holding it upright.
Thick ceramic plates, bowls, chopping boards and pan lids may not fit into narrow dividers. Very wide slots can allow small plates to lean or fall.
Compare the stated spacing where available.
Open Drying Space
An open section is useful for pans, bowls, food containers and irregularly shaped items.
A rack with many fixed plate slots may provide less flexibility. Consider how much of your washing consists of plates compared with cookware and containers.
Adjustable dividers can provide a useful compromise.
Height
A taller rack increases capacity without using more worktop width.
It can also block light, taps or wall sockets and may feel visually dominant in a small kitchen.
Check stability and overhead clearance before choosing a multi-tier model.
Drainage Direction
The rack needs to direct water towards the sink or into a removable tray.
Check whether the drainage outlet can be reversed or rotated. A fixed spout may only work when the rack is positioned on one side of the sink.
Consider the slope of the draining board or worktop.
Drip-Tray Capacity
A tray should hold the water produced by a normal load until it drains or is emptied.
A shallow tray can overflow if the spout is blocked or the rack is used away from the sink. Check for raised edges and a secure fit beneath the frame.
Empty standing water promptly.
Stability
A dish rack should remain steady as items are added and removed.
Look for:
- Broad feet
- Non-slip pads
- Balanced tiers
- Locking folding joints
- Secure cup holders
- Strong frame connections
- Suitable weight limits
Avoid loading one side heavily while leaving the other side empty.
Materials
Common materials include:
- Stainless steel
- Coated steel
- Chrome-plated wire
- Plastic
- Silicone
- Rubber
- Wood
- Bamboo
- Mixed materials
Choose according to the expected load, care requirements and exposure to water.
Rust Resistance
Metal racks need a finish suitable for repeated contact with water.
Stainless steel quality, coatings and joins can vary. Even rust-resistant products should be dried and inspected regularly.
Replace racks where corrosion affects strength or creates rough edges.
Non-Slip Feet
Non-slip feet can reduce movement and protect the worktop.
Check that each foot remains attached and free from trapped grit. Missing feet can make the rack unstable and allow exposed metal to scratch the surface.
Replacement feet may be available for some models.
Ease of Assembly
Some large and multi-tier racks require assembly.
Check whether tools are needed and follow the instructions carefully. Tighten fittings evenly and confirm that all sections are stable before loading dishes.
Retain the instructions and any spare fittings.
Ease of Cleaning
Drainage channels, tray corners, cutlery holders and joints can collect residue.
Removable components make detailed cleaning easier. Check whether the rack or individual parts are dishwasher safe where listed.
Choose a design that can be dismantled without making reassembly difficult.
One-Tier or Two-Tier Dish Rack
A one-tier rack keeps all dishes at the same level and can be easier to reach and clean.
A two-tier rack provides more capacity within a smaller footprint. It requires additional height and careful loading to remain stable.
Choose one tier for simpler everyday use and two tiers where vertical space is available but worktop width is limited.
Dish Rack or Draining Mat
A dish rack holds plates and dishes upright, improving separation and airflow.
A draining mat provides a flexible surface for cups, pans and unusual shapes. It is easier to fold and store but does not organise plates in the same way.
Many households use a rack for crockery and a mat for larger cookware or overflow.
Worktop or Over-Sink Dish Rack
A worktop rack is easy to position and can accommodate a large range of designs.
An over-sink rack drains directly into the bowl and saves worktop space. It must fit the sink securely and can reduce access to the basin.
Choose according to your kitchen layout and how often the sink needs to remain completely open.
Fixed or Folding Dish Rack
A fixed rack is always ready for use and may provide greater rigidity.
A folding rack can be stored after washing up and suits multi-purpose worktops. Hinges and folding sections require inspection and cleaning.
Choose a fixed rack for regular large loads and a folding design where the area needs to be cleared frequently.
Plastic or Metal Dish Drainer
Plastic drainers are lightweight and generally easy to rinse.
Metal racks provide a rigid structure and can hold dishes in narrower rails. Damaged coatings may rust, while plastic may scratch, stain or warp.
Compare durability, weight, cleaning and appearance rather than selecting by material alone.
Dish Rack with or without a Drip Tray
A rack with a tray can be used on a flat worktop and helps contain water.
A rack without a tray needs a draining board, sink position or separate mat. It may be simpler to clean and store.
Choose a tray where water needs containing and a tray-free design where the surface already drains effectively.
Dish Racks for Small Kitchens
Compact, folding and over-sink racks can help preserve limited worktop space.
Look for:
- Narrow footprints
- Removable cutlery holders
- Roll-up designs
- Fold-flat frames
- Adjustable widths
- Vertical storage
- Drainage directly into the sink
- Sections that can be removed
Avoid choosing a tall rack that blocks cupboards or makes the sink difficult to use.
Dish Racks for Family Kitchens
Family kitchens may benefit from greater plate capacity, pan space and separate cutlery compartments.
A two-tier rack or wide drainer can accommodate larger daily loads. Choose a strong frame and make sure the tray is large enough for the amount of water produced.
Empty dry items regularly so the rack remains available for the next load.
Dish Racks for Flats
A compact rack may be easier to use in a smaller kitchen or shared living space.
Consider whether it can be folded or stored inside a cupboard. The rack should not obstruct a communal worktop or leave water where it could damage furniture.
Clear labelling or agreed sections may help in shared households.
Dish Racks for Utility Rooms
Utility-room drainers can be used for cleaning tools, pet equipment and suitable household items.
Keep these racks separate from those used for ordinary crockery where cross-contamination is a concern.
Choose robust materials and allow the rack to dry fully between uses.
Dish Racks for Caravans and Motorhomes
Compact or collapsible racks can suit smaller sinks and restricted storage.
Check the folded size and make sure the rack can be secured before travel. Empty drip trays and dry the product completely before packing it away.
Do not leave crockery in the rack while the vehicle is moving.
Dish Racks for Double Sinks
Double sinks can support racks that sit over one bowl while leaving the other free.
Measure each sink section separately and check the divider width. Some extendable racks can rest across one bowl or the full sink.
The rack should not obstruct both waste outlets or prevent tap movement.
Dish Racks for Belfast Sinks
Deep Belfast and farmhouse sinks can accommodate over-sink racks if the span is correct.
Check the thick rim and curved edges carefully. A rack that sits inside the sink may be difficult to reach because of the basin depth.
Use protective feet that will not scratch ceramic surfaces.
Dish Racks for Stainless-Steel Sinks
Check that rack feet and support bars are smooth.
Trapped grit and exposed metal can scratch stainless steel. Lift rather than drag the rack and clean beneath it regularly.
Dry the sink and rack to reduce water marks.
Dish Racks for Ceramic Sinks
Ceramic sinks can chip if heavy cookware or metal racks are dropped against them.
Choose cushioned feet and load the rack carefully. Avoid allowing pans to swing or fall from an over-sink design.
Inspect support points regularly.
Dish Racks for Composite Sinks
Composite sinks may have specific care requirements.
Use accessories with compatible feet and avoid trapping strongly coloured residue beneath the rack. Follow the sink manufacturer’s guidance for cleaning and surface protection.
Do not use rough metal supports that could mark the finish.
Loading a Dish Rack Safely
Place the rack on a stable surface and confirm that the tray or spout is positioned correctly.
Load heavier items first and keep them low and central. Add plates, cups and lighter items without creating an unbalanced arrangement.
Do not exceed the stated capacity or stack dishes above the rack’s intended height.
Loading Plates
Place plates into compatible slots so they remain upright and separated.
Avoid forcing thick crockery into narrow spaces. Large plates should not lean so far that they make the rack unstable.
Check that plates do not block drainage channels.
Loading Bowls
Bowls need enough separation for water to escape.
Place them at an angle or in an open section rather than nesting them tightly together. Deep bowls may hold pools of water and need repositioning during drying.
Do not balance bowls precariously on top of plates.
Loading Cups and Mugs
Place cups upside down or at an angle where the rack design supports this.
Check that handles do not catch against neighbouring items. Heavy mugs should be distributed evenly.
Inspect deep bases for trapped water before putting cups away.
Loading Glasses
Keep glasses separated from heavy plates and cookware.
Use dedicated holders where provided and make sure stems or rims cannot slip through the rack. Valuable or delicate glassware may be safer on a padded draining mat.
Do not place glasses where they can be struck by the tap or cupboard doors.
Loading Cutlery
Use the cutlery holder and avoid overcrowding each section.
Mixing utensils can improve separation, but sharp items require careful positioning. Place knife blades where they cannot injure someone reaching into the holder.
Do not allow long utensils to block spray, drainage or surrounding access.
Loading Pans and Cookware
Place heavy pans on the lower level or directly on a supported open section.
Do not balance cookware on plate dividers or lightweight cup rails. Allow enough space for water to drain from handles and rims.
Check the rack’s stated load where large cast-iron or heavy cookware is involved.
Loading Chopping Boards
Chopping boards can be placed in wide slots or open sections where supported.
Large boards can act like sails and make a lightweight rack unstable. Keep them low and avoid blocking airflow to other dishes.
Wooden boards should be dried promptly according to their care guidance.
Loading Food Containers
Separate containers, lids and removable seals.
Position lightweight plastic securely so it cannot slide or overturn. Deep rims can retain water and may need shaking or repositioning.
Allow every part to dry fully before reassembly.
Loading Reusable Bottles
Use bottle pegs or an open section where the bottle remains stable.
Remove lids, straws and valves where permitted. Tall bottles can raise the rack’s centre of gravity, so distribute them carefully.
Check that each interior has enough airflow to dry.
Loading Baby Feeding Equipment
Use a clean rack or dedicated drying section where recommended.
Small bottle parts may need a compatible basket or peg system so they do not fall through the frame. Follow current healthcare and manufacturer guidance for washing and sterilisation.
A drying rack does not replace sterilisation where this remains advised.
Loading Pet Bowls
Pet bowls can be dried on a separate rack or section where practical.
Clean the rack afterwards if food residue or saliva contacts it. Keep pet equipment away from clean household dishes where cross-contamination is a concern.
Replace damaged bowls that become difficult to clean.
Preventing Dishes from Falling
Do not overload slots or balance items above the intended frame.
Check that the rack sits flat and that all feet remain in place. Keep the rack away from worktop edges and areas where people may knock it.
Use a lower position for heavy and fragile items.
Preventing Rack Tipping
Load both sides evenly and place heavy items at the bottom.
Avoid hanging several mugs or utensils from one outer edge. Make sure extendable sections are locked and wall-mounted fittings remain secure.
Stop using a rack that rocks, twists or leans under a normal load.
Managing Drainage
Position the tray or spout so water reaches the sink without crossing food-preparation surfaces.
Check the drainage path before loading dishes. A blocked or incorrectly angled channel can cause overflow.
Empty any standing water after each use.
Preventing Water on the Worktop
Use a correctly sized drip tray or draining mat beneath the rack.
Check for leaks, warped trays and blocked spouts. Wipe splashes promptly, especially around laminate joins, wood and wall edges.
Lift the rack periodically to clean and dry the surface below.
Preventing Limescale
Hard water can leave deposits on trays, rails and drainage channels.
Wipe standing water and clean the rack regularly using products suitable for its materials. Do not use acidic descalers on natural stone, coatings or metals without checking compatibility.
Rinse cleaning products thoroughly.
Preventing Rust
Keep metal racks clean and dry and inspect protective coatings.
Remove standing water and avoid leaving wet cloths against metal sections. Replace the rack if rust weakens the frame or creates sharp edges.
Do not cover corrosion with unsuitable paint where it contacts dishes.
Preventing Mould
Mould can develop where water and food residue remain trapped.
Clean beneath trays, inside cutlery holders and around feet. Allow folding and wooden racks to dry fully before storage.
Persistent mould may indicate damage, poor ventilation or a design that is difficult to maintain.
Preventing Odours
Odours can come from trapped water, food residue, damp mats and unwashed trays.
Reduce smells by:
- Emptying drip trays
- Cleaning drainage channels
- Washing cutlery holders
- Removing food debris
- Drying the rack
- Cleaning beneath feet
- Washing drying mats
- Replacing damaged components
- Improving airflow
- Avoiding wet cloth storage
Fragrance does not replace cleaning.
Cleaning a Plastic Dish Drainer
Remove all dishes and detachable sections.
Wash the rack using a suitable cleaner and pay attention to plate slots, corners and drainage channels. Rinse and dry it completely.
Avoid rough scourers that can scratch the plastic and make future cleaning more difficult.
Cleaning a Metal Dish Rack
Use a soft cloth or non-abrasive brush with a compatible cleaner.
Clean joints, wire intersections, feet and any removable tray. Dry the rack thoroughly after rinsing.
Inspect for rust, loose welds and damaged coatings.
Cleaning a Silicone Drainer
Unroll or unfold the product completely.
Wash between bars, grooves and flexible joins. Check whether dishwasher cleaning is permitted.
Allow it to dry before rolling or storing it.
Cleaning a Wooden Dish Rack
Wipe the rack using the recommended method and dry it promptly.
Do not soak it or leave it in a wet tray. Follow any manufacturer guidance about oiling or surface maintenance.
Replace wood that becomes mouldy, deeply split or unstable.
Cleaning a Drip Tray
Remove the tray and empty all water.
Wash the top, underside, corners and drainage outlet. Limescale and grease can collect even where the water appears clear.
Dry the tray before returning it beneath the rack.
Cleaning a Cutlery Holder
Remove cutlery and detach the holder where possible.
Clean inside each compartment and clear all drainage holes. Use a small brush for narrow corners and base sections.
Replace the holder if it becomes cracked or develops sharp edges.
Cleaning a Drainage Spout
Detach or rotate the spout according to the product instructions.
Remove food residue, detergent and limescale from the channel. Check that water flows freely before reassembling the rack.
Do not force a blocked spout with a sharp tool that could puncture it.
Dishwasher-Safe Components
Some trays, cutlery holders and plastic sections may be dishwasher safe.
Check the temperature and rack-position guidance. Metal frames, wooden parts, suction fittings and non-slip feet may require hand washing.
Do not place the complete rack in a dishwasher unless specifically permitted.
How Often to Clean a Dish Rack
Wipe and empty the rack after regular use and clean it thoroughly whenever residue, limescale or odour appears.
Busy households may need to wash drip trays and cutlery holders several times each week. A rack used occasionally should still be cleaned before long-term storage.
Do not wait for visible mould or rust.
Drying the Dish Rack
After cleaning, allow every section to air dry.
Turn trays and removable holders so trapped water can escape. Folding racks should remain open until completely dry.
Do not store damp components inside a closed cupboard.
Dish Racks and Cross-Contamination
Keep the drying area clean and separate from raw-food preparation.
Do not place clean dishes onto a rack that has held unwashed pet bowls, bin parts or heavily contaminated equipment without cleaning it first.
Use separate racks where household routines make this practical.
Dish Racks Around Children
Place the rack away from worktop edges.
Keep knives, glassware and hot cookware out of children’s reach. Small removable feet, clips and fittings may present choking hazards.
Do not allow children to climb on cupboards or pull dishes from upper tiers.
Dish Racks Around Pets
Pets may lick dishes, pull at cloths or knock over lightweight racks.
Position the rack where animals cannot access it and keep food residue cleaned away. Avoid drying pet bowls beside clean household dishes where this creates a hygiene concern.
Inspect silicone and rubber parts for chewing damage.
Hot Cookware
Allow hot pans, baking trays and oven dishes to cool before placing them on a rack unless the product is listed as heat resistant.
Heat can warp plastic, damage silicone and weaken coatings. It can also create burns if someone touches the rack.
Use a suitable heat-resistant mat or trivet where required.
Electrical Safety
Keep dish racks and drainage paths away from sockets, plugs and electrical appliances.
Do not position a spout where water can reach a toaster, kettle, coffee machine or charging cable.
Wipe spills and dry your hands before handling electrical equipment.
Protecting Worktops
Standing water can affect wood, laminate, natural stone and worktop joins.
Use a tray or mat suited to the surface and clean beneath it regularly. Do not allow grit to remain beneath rack feet.
Follow the worktop manufacturer’s care guidance.
Protecting Sink Finishes
Use smooth support feet and remove grit before positioning over-sink racks.
Avoid dragging metal bars across ceramic, stainless-steel or composite surfaces. Check that adjustable arms do not apply excessive pressure to the sink rim.
Replace missing protective caps.
Storing a Fixed Dish Rack
A fixed rack may remain beside the sink where there is enough space.
Keep it clean and empty between washing loads. Do not use the rack as permanent storage if this prevents it drying or makes cleaning difficult.
Move it periodically to clean the worktop below.
Storing a Folding Dish Rack
Clean and dry the rack before folding it.
Collapse the product using the intended hinges and store it where it will not be bent or crushed. Keep removable holders with the rack.
Inspect the locking sections before reopening it.
When to Replace a Dish Rack
Replace the rack when it becomes:
- Rusted
- Cracked
- Warped
- Unstable
- Difficult to clean
- Permanently mouldy
- Sharp around the edges
- Damaged around joints
- Unable to drain
- Missing essential feet
- Unable to support dishes safely
- Permanently odorous
A damaged rack can drop dishes, scratch surfaces or harbour residue.
Useful Dish Rack Accessories
Useful additions may include:
- Draining mats
- Replacement drip trays
- Cutlery holders
- Cup racks
- Bottle pegs
- Non-slip feet
- Drainage spouts
- Sink protectors
- Washing-up bowls
- Bottle brushes
- Dishcloths
- Cleaning brushes
Check dimensions and model compatibility before ordering replacement sections.
Why Buy Dish Racks and Drainers from YPC?
At YPC, we understand active lifestyles and the need for practical products that work in real use. Our Dish Racks and Drainers category makes it easier to compare compact, folding, two-tier, over-sink and self-draining designs for different kitchens.
Browse the available options and compare dimensions, capacity, materials, plate spacing and drainage features to find a dish rack suited to your sink, worktop and everyday washing-up routine.
Frequently Asked Questions
What size dish rack should I choose?
Measure the available worktop or sink space and consider the number and size of dishes you wash regularly. Include cutlery holders, trays and drainage spouts in the measurements.
Is a two-tier dish rack better than a single-tier rack?
A two-tier rack provides more capacity within a smaller footprint, while a single-tier model is simpler and easier to reach. The better choice depends on your space and washing load.
How can I stop a metal dish rack from rusting?
Clean and dry it regularly, remove standing water and inspect coatings for damage. Replace the rack if rust creates sharp edges or weakens the frame.
Can an over-sink rack fit any sink?
No. Measure the sink opening, rim and tap clearance and compare them with the rack’s supported span. It must rest securely on both sides.
How often should a dish rack be cleaned?
Clean trays and drainage sections regularly and wash the complete rack whenever residue, limescale or odour appears. Busy kitchens may require cleaning several times each week.
 Getting ready for Summer? View our Home and Garden Products

Heading outdoors this winter? Take a look at our Outdoor Clothing.